Welcome, everyone!
In this post, we’ll explore how to generate Excel files in a Node.js application using Express and ExcelJS. We’ll cover everything from setting up your Node.js project, configuring ExcelJS, creating routes and controllers, and outputting data to an Excel file format that’s ready for download.
Note: The GitHub repository for this project, including all code examples, will be provided below.
Let’s dive in!
Prerequisites
If you’re new to setting up a Node.js project, this section is for you. However, if you’re already familiar with the basics, feel free to skip ahead.
For this tutorial, make sure you have the following set up:
- Node.js installed in your environment. If not, you can download it here.
- VS Code as your IDE (or another editor of your choice). You can download it here.
Setting Up the App
In this section, we’ll set up the initial project structure and install the necessary dependencies for generating Excel files in our Node.js application. We’ll use npm to manage dependencies, but you’re free to use Yarn if that’s your preference.
- Create the project folderOpen your terminal, navigate to the directory where you’d like to set up the project, and use the following commands to create and enter the project folder:
mkdir excel-generator-app cd excel-generator-app - Initialize the projectNext, initialize the project using npm (or Yarn if you prefer). This will create a
package.jsonfile to manage the dependencies for our app. To initialize with npm, use:npm init -yThis will generate a
package.jsonfile with default settings, which can be customized as we add dependencies. - Install project dependenciesNow, let’s install the necessary dependencies for this project. We’ll use Express for setting up our server and ExcelJS for generating Excel files. Run the following command:
npm install express exceljs npm install --save-dev @types/express typescript ts-nodeThis installs Express and ExcelJS as main dependencies and adds the necessary types for Express and TypeScript as dev dependencies.
Project Structure
To give you a clear view of how our application will be organized, here’s the folder layout we’ll use:
└── excel-generator-app/
│
├── src/
│   ├── index.ts
│   ├── routes/
│   │   └── excelRoute.ts
│   ├── controllers/
│   │   └── excelController.ts
│   ├── services/
│   │   └── excelGenerationService.ts
│   └── interfaces/
│       └── productInterface.ts
│
├── node_modules/
├── package.json
├── tsconfig.json
└── package-lock.json
In this structure:
- The
src/folder will contain all TypeScript code for the application. index.tsserves as the main entry point, where we’ll set up and run the Express server.- The
routes/folder will include route files, withexcelRoute.tshandling routes for Excel file generation. - The
controllers/folder will store controller files, such asexcelController.ts, which contain logic for generating and streaming Excel files. - The
services/folder will hold services likeexcelGenerationService.ts, responsible for generating Excel files using ExcelJS. - The
interfaces/folder undersrc/will define TypeScript interfaces, includingproductInterface.ts, to structure data models used in the application.
Setting Up TypeScript
Now, let’s set up TypeScript for the project. To do this, we need to configure the tsconfig.json file, which will define how TypeScript compiles our code.
- Create the
tsconfig.jsonfileRun the following command to create the TypeScript configuration file:npx tsc --init - Configure the
tsconfig.jsonOpen the generatedtsconfig.jsonfile and update it to the following settings to properly handle the TypeScript compilation for this project:{ "compilerOptions": { "target": "ES6", "module": "commonjs", "strict": true, "esModuleInterop": true, "skipLibCheck": true, "forceConsistentCasingInFileNames": true, "outDir": "./dist", "rootDir": "./src" }, "include": ["src/**/*"], "exclude": ["node_modules"] }"target": "ES6"ensures that the JavaScript output is compatible with modern environments."module": "commonjs"is the module system used by Node.js."outDir": "./dist"specifies the folder where compiled JavaScript files will be stored."rootDir": "./src"defines where the TypeScript source files are located.
Optional Bonus: Setting Up Nodemon :
To make the development process easier, you can set up Nodemon to automatically restart the server whenever there are changes to the source files.
- Install Nodemon as a dev dependency:
npm install --save-dev nodemon - Update
package.jsonscriptsAdd a script to thepackage.jsonfile to run the app with Nodemon. Modify the"scripts"section as follows:"scripts": { "dev": "nodemon src/index.ts", "start": "ts-node src/index.ts" } - Running the app with NodemonNow, you can run the app with:
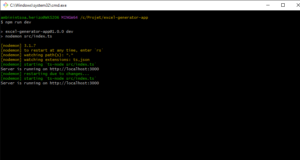
npm run devThis will start the app and automatically restart the server whenever you modify the TypeScript files.

Here’s the expanded setup for the folder structure and files with all the key components, including explanations for the service, controller, route, interface, and main entry point.
Setting Up the Folder Structure and Files for Excel Generation
In this part, we’ll create the folder structure, configure the main index.ts file, set up routes in excelRoute.ts, implement the Excel generation logic in excelController.ts, define a service in excelGenerationService.ts, and set up a TypeScript interface in productInterface.ts. Here’s an outline of each file and its purpose.
1. src/interfaces/productInterface.ts
The interface file defines the structure of the product data, specifying the types for each property in the Product interface. This makes it easy to enforce structure and provide type safety across our codebase.
export interface Product {
id: number;
name: string;
price: number;
quantity: number;
};
Explanation:
- Type Definitions: Each field has a specific type, such as
number,string, orboolean, which helps in preventing errors and ensures consistency when creating or modifying products in the application.
2. src/services/excelGenerationService.ts
This service handles the core logic for generating an Excel file from JSON data. It uses the exceljs library to create a workbook, add a worksheet, define headers and rows based on the JSON data, and then send the file as a downloadable response.
import { Response } from 'express';
import exceljs from 'exceljs';
import { Product } from '../interfaces/productInterface';
export default class ExcelGenerationService {
static async generateExcelFile(jsonData: Product[], res: Response): Promise<void> {
try {
const workbook = new exceljs.Workbook();
const worksheet = workbook.addWorksheet('Products');
// Define headers based on JSON data keys
const headers = Object.keys(jsonData[0]);
worksheet.addRow(headers);
// Populate rows with data
jsonData.forEach(data => {
const row: any[] = [];
headers.forEach(header => {
row.push(data[header as keyof Product]);
});
worksheet.addRow(row);
});
// Set response headers for downloading
res.setHeader('Content-Type', 'application/vnd.openxmlformats-officedocument.spreadsheetml.sheet');
res.setHeader('Content-Disposition', `attachment; filename=products-${Date.now()}.xlsx`);
await workbook.xlsx.write(res);
res.end();
} catch (error) {
console.error('Error generating Excel file:', error);
throw new Error('Failed to generate Excel file');
}
}
};
Explanation:
- Workbook and Worksheet: An Excel workbook is created with a worksheet titled “Products.”
- Headers and Rows: Headers are derived from the JSON data’s keys, and each row is populated based on these keys.
- Response Headers: Headers set the appropriate MIME type and prompt a file download with a unique filename.
- File Streaming: The workbook is streamed directly to the response, making the Excel file available for download.
3. src/controllers/excelController.ts
This controller is responsible for handling the request to generate an Excel file by calling the service method and passing data from the request body.
import { Request, Response } from 'express';
import ExcelGenerationService from '../services/excelGenerationService';
import { Product } from '../interfaces/productInterface';
export default class ExcelController {
static async generateExcelFile(req: Request, res: Response) {
const jsonData: Product[] = req.body;
try {
await ExcelGenerationService.generateExcelFile(jsonData, res);
} catch (error) {
console.log('Error generating Excel:', error);
res.status(500).json({ error: 'Failed to generate Excel file' });
}
}
};
Explanation:
- Error Handling: If an error occurs during Excel file generation, it sends a 500 status with an error message.
- Service Invocation: The controller calls
generateExcelFilefrom the service to handle Excel file creation and download.
4. src/routes/excelRoute.ts
This route file defines the endpoint for generating Excel files, which links the controller’s method to the /generate-excel route.
import express from 'express';
import ExcelController from '../controllers/excelController';
const router = express.Router();
router.post('/generate-excel', ExcelController.generateExcelFile);
export default router;
Explanation:
- Route Setup: A
POSTendpoint at/generate-excelis set up to handle requests for Excel file generation.
5. src/index.ts
This is the main entry point of the application, where the Express server is initialized and configured with middleware and routes.
import express, { Application } from 'express';
import excelRoute from './routes/excelRoute';
const app: Application = express();
const PORT = process.env.PORT || 3000;
app.use(express.json());
app.use('/api', excelRoute);
app.listen(PORT, () => {
console.log(`Server is running on <http://localhost>:${PORT}`);
});
Explanation:
- Express Setup: Basic Express setup with JSON middleware and integration of the Excel route.
- Server Listening: The server listens on the specified
PORT, defaulting to 3000 if no environment variable is set.
This setup provides a complete structure where:
productInterface.tsdefines the structure of the product data.excelGenerationService.tscontains the logic to generate the Excel file.excelController.tsmanages the request and calls the service to create the Excel file.excelRoute.tssets up a route for file generation.index.tsinitializes the server and applies routing.
This structure provides a clean separation of concerns, ensuring that each part of the application is easy to maintain, test, and expand.
Testing the App
To test the Excel generation feature, you can use Postman or other API testing tools like Insomnia or Hoppscotch.
- Clone the GitHub RepositoryStart by cloning the GitHub repository where the complete project is hosted:
git clone <https://github.com/dev-luckymhz/node.js-express-excel-generator> cd node.js-express-excel-generator npm install npm run dev - Testing with Postman (or an Alternative Tool)
- Open Postman or your preferred API testing tool.
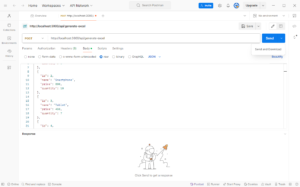
- Set up a
POSTrequest tohttp://localhost:3000/api/generate-excel(adjust the port if necessary). - In the Body tab, select raw and set the format to JSON.
- Use the following sample JSON data to test the Excel generation:
[ { "id": 1, "name": "Laptop", "price": 1200, "quantity": 5 }, { "id": 2, "name": "Smartphone", "price": 800, "quantity": 10 }, { "id": 3, "name": "Tablet", "price": 450, "quantity": 7 }, { "id": 4, "name": "Headphones", "price": 150, "quantity": 20 }, { "id": 5, "name": "Smartwatch", "price": 300, "quantity": 12 } ]
- Send the Request
- In the Send button on Postman, click the small dropdown arrow.
- Choose Send and Download from the dropdown options.
- Postman will automatically prompt you to save the Excel file upon receiving the response.
- Select a location to save the file, which will contain your JSON data as an
.xlsxfile.
This test verifies that the Excel generation and download functionality works as expected. You should receive an .xlsx file named something like products-<timestamp>.xlsx, containing the structured product data.

мфо займ онлайн zaimy-23.ru .